Most kitchen renovations go beyond budget or duration since the planning phase was incorrect. There was inspiration before taking inventory. The solution is easy: check what is not functioning correctly in your current kitchen before you observe even a single tile or cabinet finish. Go through a normal cooking session and write down the bottlenecks – the corner you can’t use, the cluttered bench, the shadow from the light falling exactly where you are cutting. The bottleneck list is your real briefing.
Once you’ve defined the problems, you can set a realistic budget. Kitchen renovations have a habit of costing more than people expect — not because contractors are unreliable, but because opening up walls and floors tends to reveal things: old plumbing that needs replacing, wiring that isn’t up to code, a subfloor that’s seen better days. Build in a 10–15% contingency from the start. It’s not pessimism, it’s just giving yourself room to make good decisions rather than rushed ones.
Design And Layout: Function First, Form Second
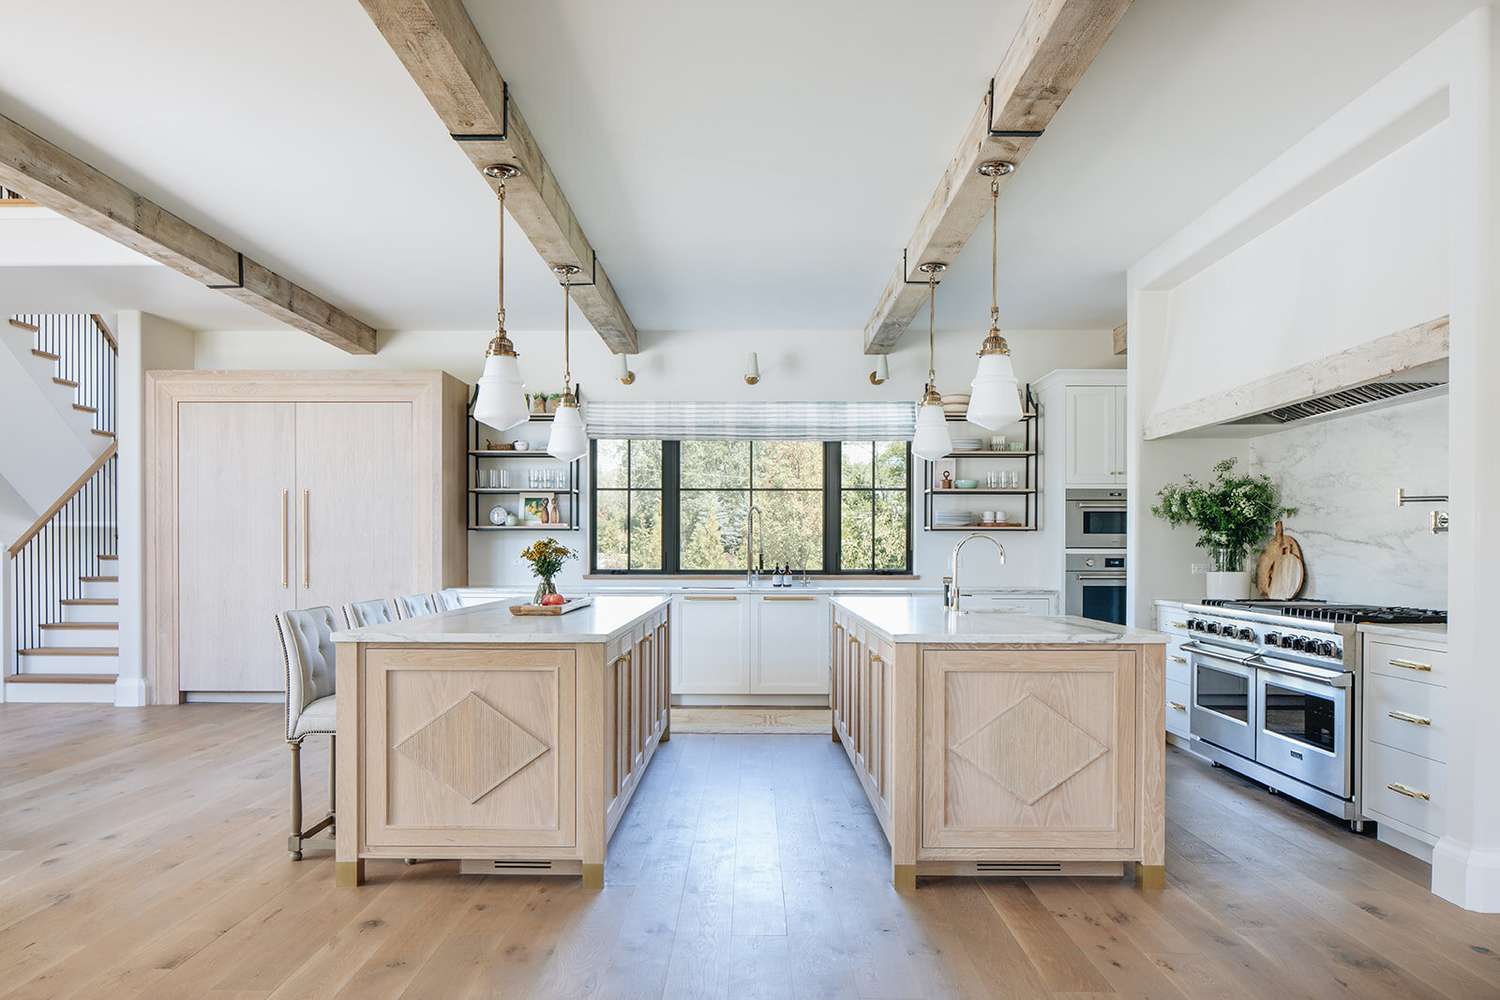
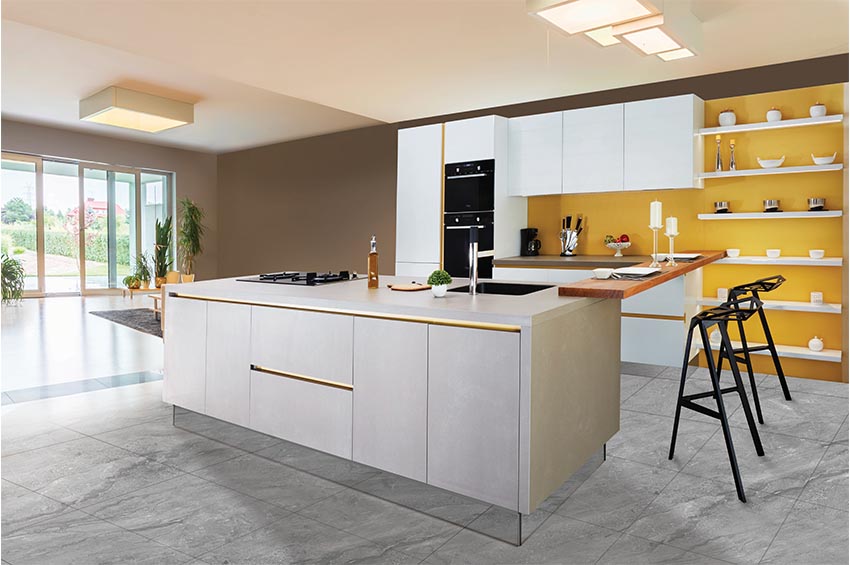
Decisions about layout are the ones that need to come first because they impact everything downstream. The work triangle – the spatial relationship between your refrigerator, stove, and sink – is where ergonomic planning starts. The goal is to keep total travel distance manageable and free from obstruction. In smaller rooms, a U-shaped layout achieves this without wasting wall space. In larger, more open-plan spaces, a G-shaped configuration can add a fourth anchor point without disrupting flow.
Once you’ve settled on a layout footprint, get the measurements right before you commit to anything. Then visit showroom locations in person – looking at cabinetry finishes and benchtop materials on a screen doesn’t tell you how a stone surface actually feels under your hands, or how a soft-close drawer runner performs compared to a standard one. Those tactile details matter when you’re making decisions that need to hold up for ten or fifteen years.
Before finalizing cabinetry dimensions, lock in your appliances. Ovens and refrigerators have specific ventilation clearances that the joinery has to accommodate. Choosing your appliances after the cabinets are built is one of the most common and expensive sequencing mistakes in a kitchen renovation.
Permits And Structural Checks
If you’re making changes that could affect the structure of your house or require load-bearing walls to be altered, you’ll have to go through the permitting process. This will ensure that everything is done safely and up to code.
Identifying these walls as early as possible is crucial to the success of your project. It’s better to bring in a structural engineer right at the start rather than make plans based on assumptions and then have to go back to the drawing board.
A good contractor will have been through the permitting process many times and can take most of it off your plate – filing the paperwork, knowing what the local authority needs, and flagging anything that might cause a delay. What they can’t do is make decisions on your behalf, so stay in the loop. If a permit comes back with conditions attached, you’ll want to understand what they mean before work continues. Think of it less as admin and more as a conversation between you, your contractor, and the people responsible for making sure the build is safe.
The Build Sequence: Why Order Matters
Demolition day is the point of no return, and it needs a waste management plan in place before it starts. Once the old kitchen is out, the rough-in phase begins – this is when plumbing and electrical lines are repositioned and extended to match your new layout. This phase must happen before cabinetry goes in. Reversing that order means pulling out installed units to access pipes or conduit, which doubles labor costs for no reason.
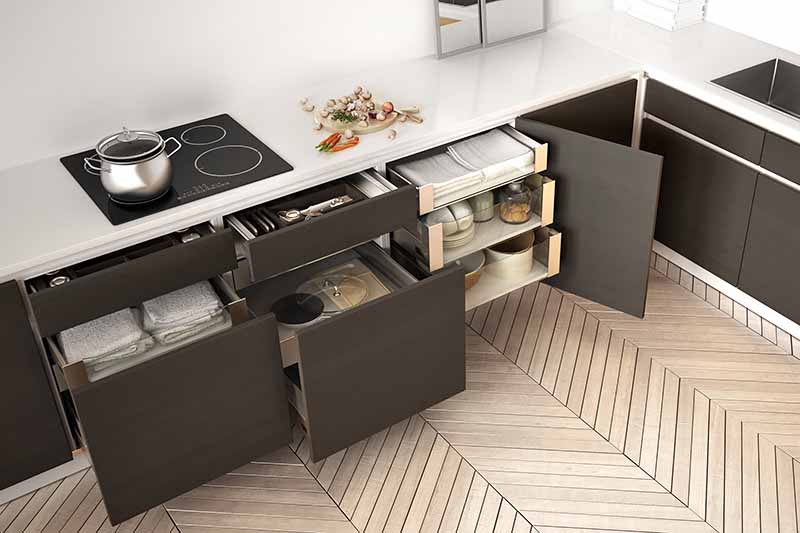
After rough-in is signed off and walls are closed, cabinetry installation follows. The cabinetry carcass – the internal box structure of each unit – is what determines long-term durability, not the door face. Cheaper carcasses built from lower-grade board will sag and swell over time regardless of how good the external finish looks.
Benchtops come after cabinetry is fully installed and templated. Stone requires precision templating because it’s cut off-site. Laminate offers more flexibility but still needs accurate measurements. Neither forgives poor cabinetry installation underneath.
Splashbacks, task lighting, and hardware are typically the final phase. Task lighting over prep areas is separate from the general ambient lighting in the room and shouldn’t be an afterthought – it’s one of the most practical upgrades in a kitchen renovation and one of the cheapest relative to its daily use.
The Snag List Walkthrough
Do not make the final payment until you have made a full walkthrough with your trades. You want to be the one pointing out stuff to them, not the other way around. Make sure every door lines up perfectly, and open and close them all. Do the handles feel secure? Are they all level and at the same height? Do the drawers open and close perfectly? Are they spaced evenly? Look at the sealant joint where the sink meets the splashback – is it clean and consistent? Are there any gaps or glue marks? Are the appliances all turned on and connected properly – especially the dishwasher and waste disposal?
This is called a snag list, and it exists specifically to catch the small issues that are cheap to fix before handover and expensive to chase down afterward.
A kitchen renovation done in the right order, with the right trades scheduled at the right time, is genuinely manageable. The ones that go wrong almost always made an avoidable sequencing error somewhere in the first third of the project.